Github OAuth Setup
For full details on setting up OAUTH 2.0 for an application to work with GitHub, see here.
For your convenience, we provide summary steps below:
Login or setup an account with GitHub: If you are an individual working alone with the Overture suite, you may wish to use a personal account. However, if you work for a larger organization or institution, they may already have a designated account that you can or should be using. Please consult your IT department if required.
Access Developer Settings: Click on your profile icon in the top right corner, then go to Settings. From the links on the left, navigate to Developer Settings.
Create a New OAuth App: In the left-hand menu, click on OAuth Apps, then click New OAuth App.
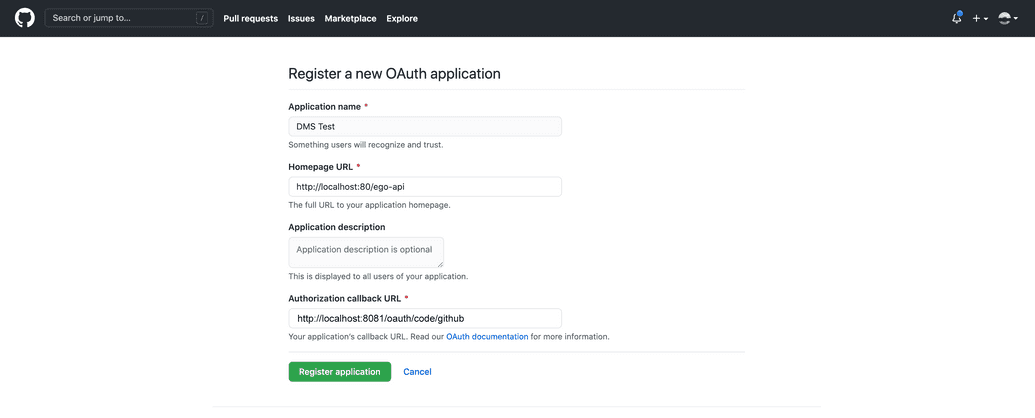
- Enter Application Details: Provide the following information for your app:
- Application Name: Enter a descriptive name for your app.
- Homepage URL: Enter the URL to your app's homepage. Depending on your deployment, enter the following:
- Local: http://localhost:
<port>/ego-api - Server: https://
<myDomain>/ego-api
- Local: http://localhost:
- Configure Authorized Callback URIs: In the Authorized callback URIs field, enter the URL where GitHub will redirect users once they have authenticated with the provider (i.e., redirect them back to Ego once logged in successfully). Depending on your deployment, enter the following:
- Local: http://localhost:
<port>/oauth/code/github - Server: https://
<myDomain>/oauth/code/github
- Register the Application: Click on Register application.
- Copy Client ID and Client Secret: After registering the app, you will see the Client ID and Client Secret displayed. Make sure to copy and securely store these for later use.
You can always view the Client ID and manage the Client Secrets for your app by going back to Developer Settings > OAuth Apps > General section in the app's left-hand navigation bar:
Note: GitHub only displays the Client Secret when initially created. If you do not copy it immediately, you will not be able to see it again. If you lose or forget the secret later on, you will need to generate a new secret and delete the old one.
- Use Client ID and Client Secret: During Ego installation, provide the Client ID and Client Secret when prompted.


