Using the API
In addition to using the Ego Admin UI, you may also interact with Ego using the following methods:
Using cURL commands in the command line
Using the Swagger UI
- The Swagger UI is ideal for exploration and simple use cases. It will contain detailed descriptions of all the available endpoints, expected inputs, and error responses.
- Depending on your deployment, you can access the Swagger UI from one of the following links:
| Mode | URL |
|---|---|
| Local | http://localhost:8080/swagger-ui.html |
| Server | https://<YOUR-URL>/ego-api/swagger-ui.html# |
In both of these scenarios, the user or application must first authenticate with the Ego API. The sections below describe how to authenticate with and use the Ego API.
Retrieving Your Ego JWT
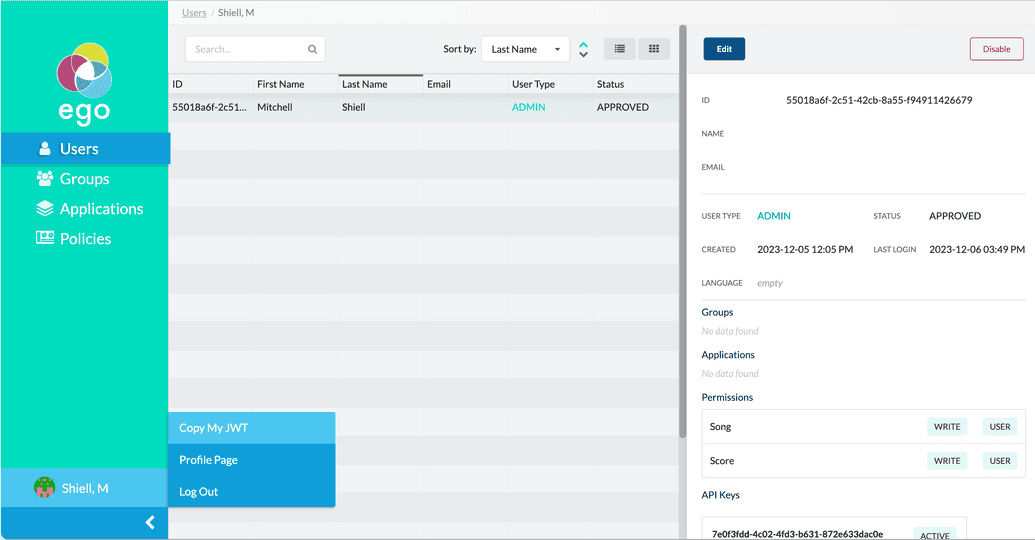
Log into the Ego-UI, and from the profile menu found in on the bottom of the left-hand panel select, Copy My JWT.
Generating an API Key for a User
Next, we will use the Ego API to generate an API Key for another user, so that they have WRITE access to both Song and Score.
Prerequisites
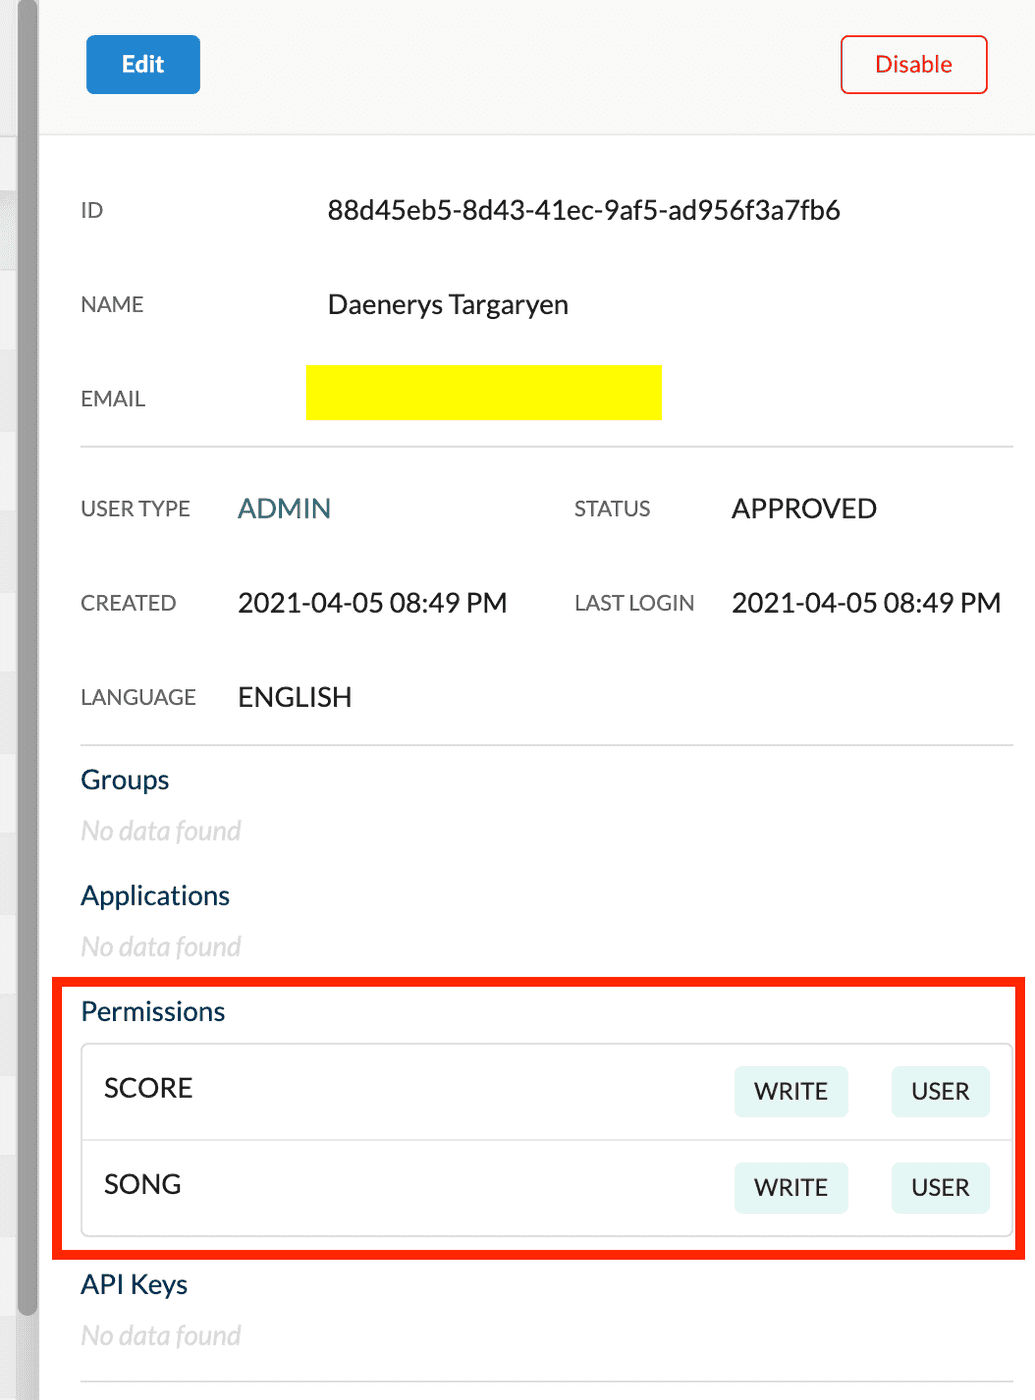
- Open the Ego Admin UI and click on Users in the left-hand menu. Then, select the user for whom you want to generate the API Key. This will display their profile. Copy the
IDof the user, as it will be required when supplying the necessary parameters to the relevant endpoint.
- Click Applications from the left-hand menu and ensure the required applications, for which you want the API Key generated, have been configured. For our example, we want to provide access to the Song and Score applications. For more information on configuring applications within Ego see our page on managing applications.
- Select Policies from the lefthand menu and make sure the required policies you want the API Key to be generated for have been configured. In this example, we want policies for the Song and Score applications. For more information on configuring policies within Ego see our page on managing policies.
- Next, make sure the user you want to generate the API Key for has the necessary permissions already assigned to their profile. If the user does not have the proper permissions assigned, the key cannot be generated.
 Tip
Tip
The example we provide here is applicable to all Ego API endpoints. Using other endpoints follows a similar process, where you must first authorize with the API, then supply the necessary input parameters to the desired endpoint. Both Swagger UI and cURL are available to make requests to the API.
Using Swagger UI
To generate an API Key using the Swagger UI:
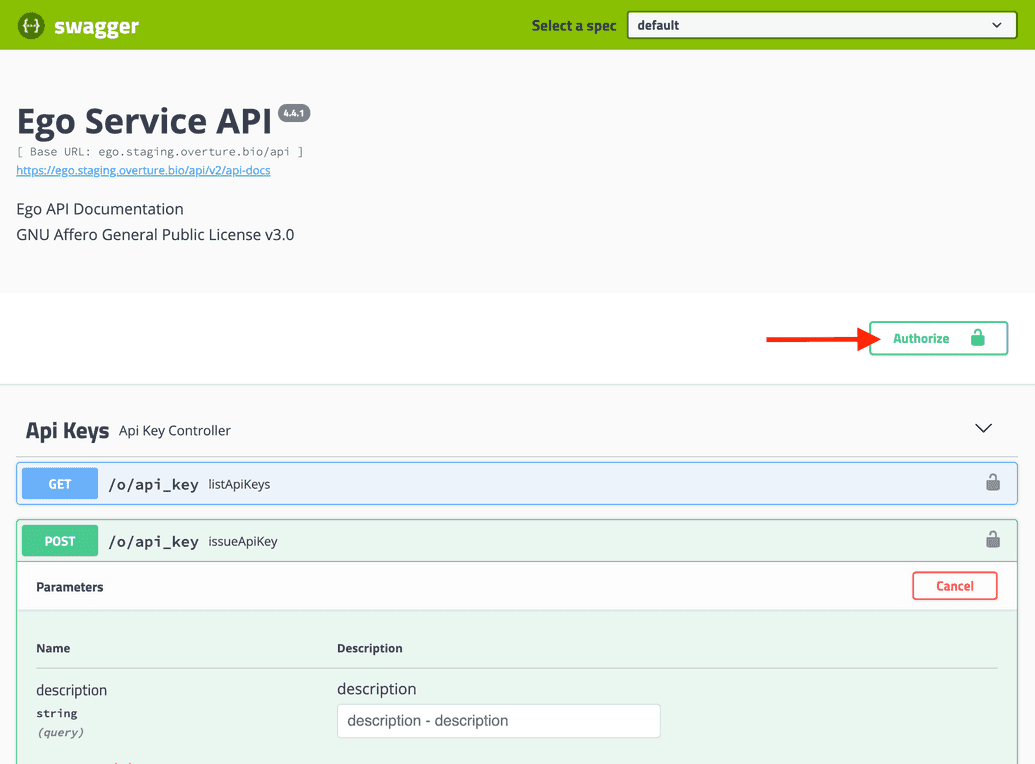
Go to the swagger UI for your installation at
<url>/ego-api/swagger-ui.html, where<url>is the base URL where Ego is deployed.In the top right, click the Authorize button (open lock icon):
- A dialog appears asking you to authorize with the API. In the
Valuebox, enter the following:
Bearer <JWT>
Where <JWT> is the Ego Admin JWT you recorded earlier in the prerequisite steps.
- Click Authorize:
- If successful, the open lock icon becomes closed, and the dialog will show a Logout button:
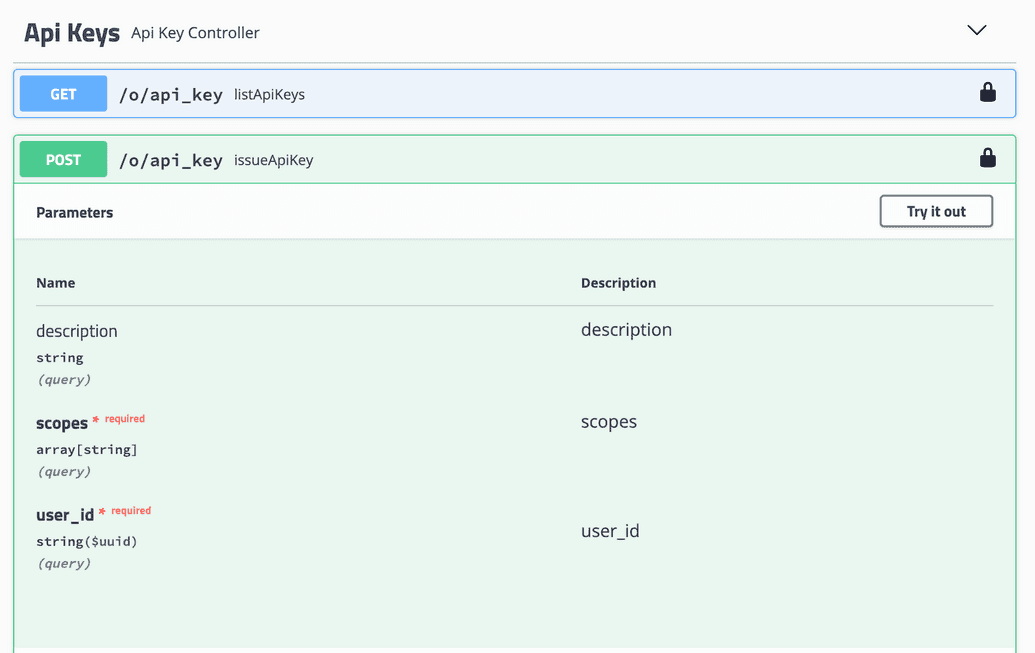
- You are now authorized to use the endpoints. Under the API Keys section, click the
POSTendpoint calledissueApiKey. The endpoint input parameters are displayed:
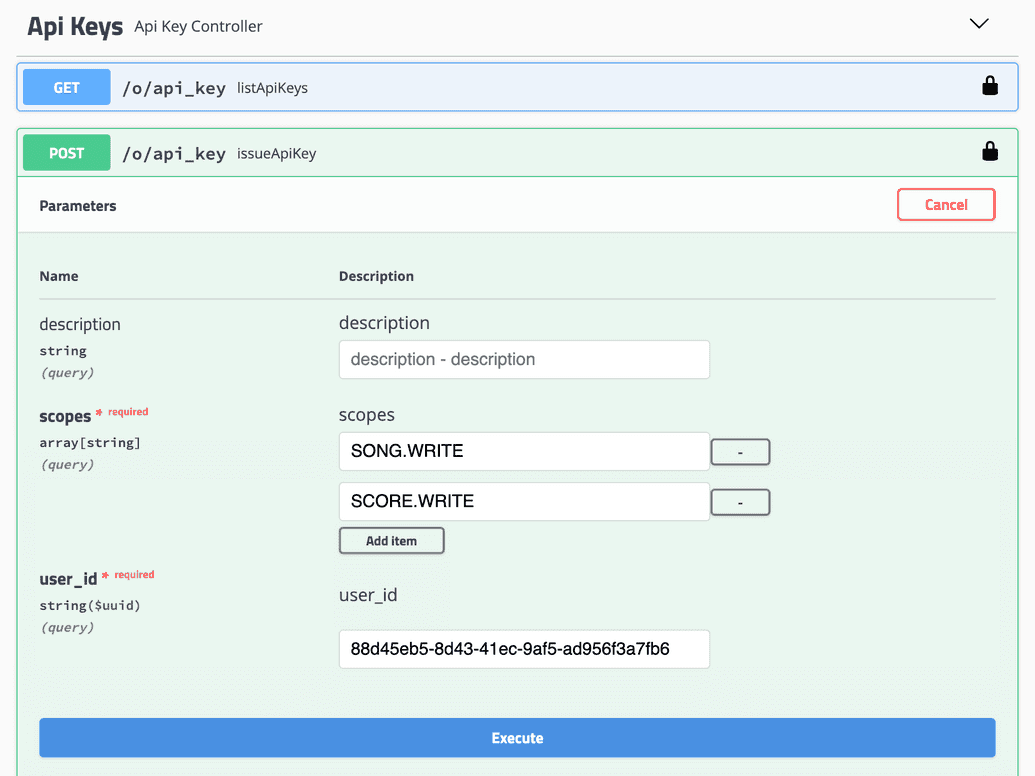
- Click Try it out. You can now enter the parameters needed to generate the API Key:
| Param | Description |
|---|---|
| description | Optional description of the API Key being generated. |
| scopes | Enter the specific scopes or permissions to grant for this API Key. In our example, we want to provide WRITE access to the SONG and SCORE policies. Hence, we add an entry for each of SONG.WRITE and SCORE.WRITE. |
| user_id | ID of the user that you recorded earlier from the Ego Admin UI, for whom this API Key is being generated. |
- Click Execute. If successful, the responses section will show a response indicating the API Key was generated:
{"name": "1a1a72a4-224f-41a0-9825-c0dacadba228","scope": ["SONG.WRITE","SCORE.WRITE"],"expiryDate": "2021-05-06T01:42:35.228+0000","issueDate": "2021-04-06T01:42:35.228+0000","isRevoked": false,"description": null}
- You can also log back into the Ego Admin UI and check that an
ACTIVEAPI Key with the correct permissions has been generated in that user's profile:
Using cURL
To generate the API Key via a cURL command:
- Execute the following cURL command:
curl -X POST "<url>/ego-api/o/api_key?scopes=<scope1>&scopes=<scope2>&user_id=<userId>" -H "accept: application/json" -H "Authorization: Bearer <JWT>"
Where:
<url>is the base URL you have deployed Ego to<scope1>,<scope2>, etc. are the specific scopes you want to assign - In our example it will beSONG.WRITEandSCORE.WRITE<userId>is the internal Ego ID for the user that the API Key is being generated for<JWT>is the Ego Admin JWT you recorded earlier
For example:
curl -X POST "https://dms.test.cancercollaboratory.org/ego-api/o/api_key?scopes=SONG.WRITE&scopes=SCORE.WRITE&user_id=88d45eb5-8d43-41ec-9af5-ad956f3a7fb6" -H "accept: application/json" -H "Authorization: Bearer <JWT>"
- If successful, the response will indicate that the API Key was generated:
{"name":"5c93077b-bcd6-4840-bad2-5dc3672eec50","scope":["SONG.WRITE","SCORE.WRITE"],"expiryDate":"2021-05-06T02:13:34.559+0000","issueDate":"2021-04-06T02:13:34.559+0000","isRevoked":false,"description":null}
- You can also log back into the Ego Admin UI and check that an
ACTIVEAPI Key with the correct permissions has been generated in that user's profile:
